Better Code Browsing in Squeak
I am planning a series of articles to help people get accustomed to new and better tools in Squeak. This is mostly written just for fun and hopefully it would be useful to students taking Ralph's object-oriented course with Squeak over summmer. Squeak is a very different way of programming when compared to other programming languages and IDE. So, while I am not hoping for some miraculous conversion, I do hope to make it easier for people to work more comfortably within Squeak after using some of the current state-of-the-art IDEs.Many people hear that the code browser in Squeak (or any Smalltalk for that matter) is designed for code browsing. In other words, the browser is optimized to help you read code.
However, I have found that reading code in the regular Squeak environment can quickly become a big mess especially if you are trying something out for the first time and need to read multiple implementations in different classes. Usually, when this happens, you end up with a proliferation of browser windows that quickly clutter your screen. I am assuming that veteran Smalltalkers don't find this a problem because:
- they know most of the methods so well that there isn't much need to refer to it
- they have LARGE monitors so 20 open browsers is not a problem
- they are just disorganized and don't give a damn about it
In this article, I am going to show you how to use the OmniBrowser with some new enhancements. The same group that made the OmniBrowser has also created a whole bunch of very nifty tools. I'll try to get to each one in separate articles. But before that, let me divert your attention to this very relevant message:
A Squeak Smalltalk Development Example:
"Most developers who use Squeak would have a plethora of extra tools and utilities installed that make developing a much nicer experience than what you see in this tutorial. Do yourself a favor and start your Squeaking with a real developer’s image loaded with all the proper goodies like the SqueakDev image maintained by Damien Cassou."
So at this moment, I am going to insist that you download one of the excellent images maintained by Damien over at his webpage. Don't even bother using the basic squeak image. The basic image is pretty disheartening and discouraging to any new developer who is trying Squeak for the first time. Since Squeakers are usually developers, I have always found it mind-boggling that the standard Squeak image does not include better support for developers out-of-the-box. Instead, it is cluttered with a lot of stuff that most developers don't care about.
For this tutorial I am using the squeak-web/beta version from here. Don't forget to grab the SqueakV39.sources file from here as well.
Here's our scenario: we want to see how to actually implement the relevant methods so that two objects can be compared to one another for sorting purposes. Here's a step-by-step guide to how I would use the OmniBrowser + enhancements to do it.
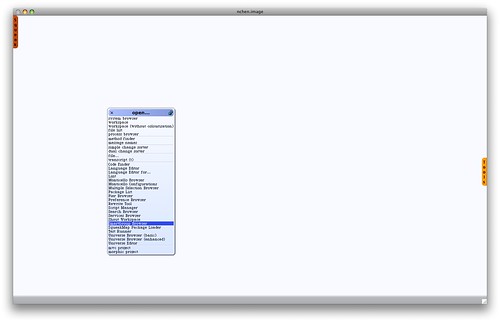
Open the SmartGroup Browser
Bring up the World Menu in Squeak and select the SmartGroup Browser.
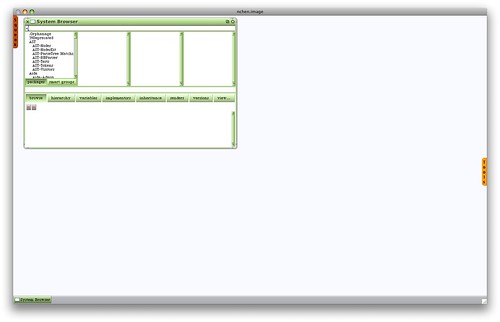
Type in the '<' selector
In the top pane of the SmartGroup Browser type in '<'. The top pane is called the Mercury Pane and it lets you type in class/selector names and quickly displays it in the current browser for you. For more information about the Mercury Pane see this.
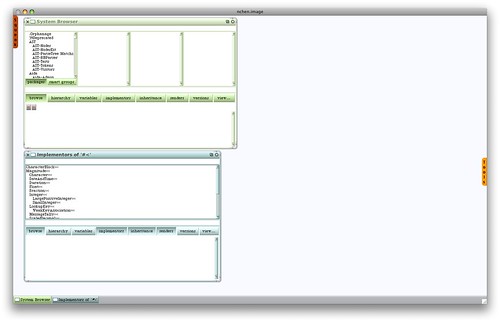
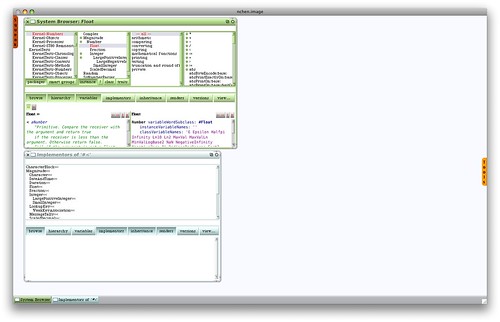
New window showing the implementors of '<'
A new windows pops-up showing the implementors. I think it is OK to have a new window pop-up with the search results. Also notice that this actually shows the classes in a hierarchical manner (by tabs). So you can see that Character is a subclass of Magnitude.
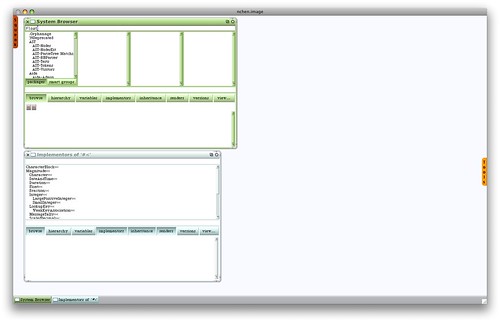
Search for 'Float'
Now back in the SmartGroup Browser, I am going to search for the Float class since I am interested in seeing the definition of the method for it. I am going to enter 'Float' in the Mercury Pane.
Split Panes in the Browser!
By doing a Shift+Click on a class/method you split a new pane with it!
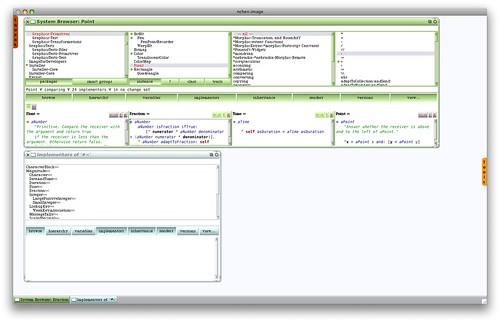
Multiple Split Panes showing all the methods
By repeating the Shift+Click process, we can create as many split panes as we want. Usually it's enough to have about 4 of them.
Also, don't forget that you can browse back using the '<<' button.
For comparison, this is what it would look like if we had to use the normal tools from the standard Squeak image. Look at the wasted screen estate and how I don't see any nice hierarchical information between the classes.
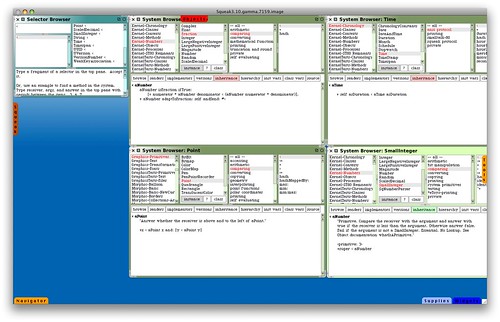
This is roughly what it would look like to find the '<' method in Squeak 3.10 without the new tools.
We start by trying to look for the '<' selector in the Method Finder and then clicking on each method to see its definition.
Notice that there can be no end to the list of new windows!
So I claim that by using the new tools, reading code in Squeak is much more organized. Good organization not only helps the developer focus but also makes it more approachable (and less intimidating) for a new user. Personally, I advocate that any new tutorial about Squeak be written with reference to these new tools. These new tools are hidden gems that need to be exposed to the world! Only by getting more people to use them can we:
- improve existing tools based on user feedback and experience
- actually get new tools to appear for Squeak - after all what's the motivation of creating new tools if everyone is just using the old way?
- change people's perception that Squeak's tools are 20-years outdated compared to more polished tools such as Eclipse
- make it easier for first-time developers to use Squeak. Seaside has already done a fantastic job garnering attention for Squeak and we should take this opportunity to make it easier for developers to get started
I also hope that people will be less close-minded about enhancing Smalltalk as evident from some of the comments in the following posts:
Of course, changes should be implemented judiciously but without an open-minded attitude toward change, nothing will change.
Tweetcomments powered by Disqus